Dagu Rover 5 Robot Chassis + Arduino + L293 Motor Shield
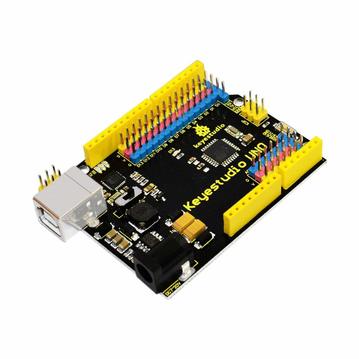
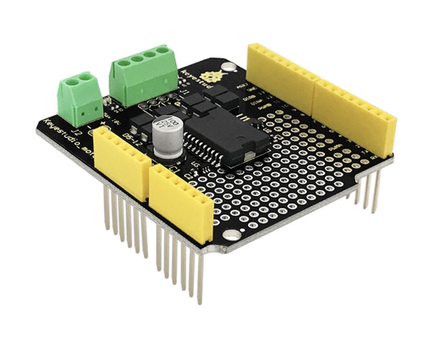
1. Attach the Motor Shield to the Arduino Uno. (This motor shield is based on the Adafruit V1 L293d) (Search for the L293d motor shield when purchasing online) (Include the AFMotor.h library when coding. You will need to add the library by going to the menu > Sketch>Include Library>Manage Libraries and search for the Adafruit Motor Shield Library. Then install it. Be sure you chose the V1 version.
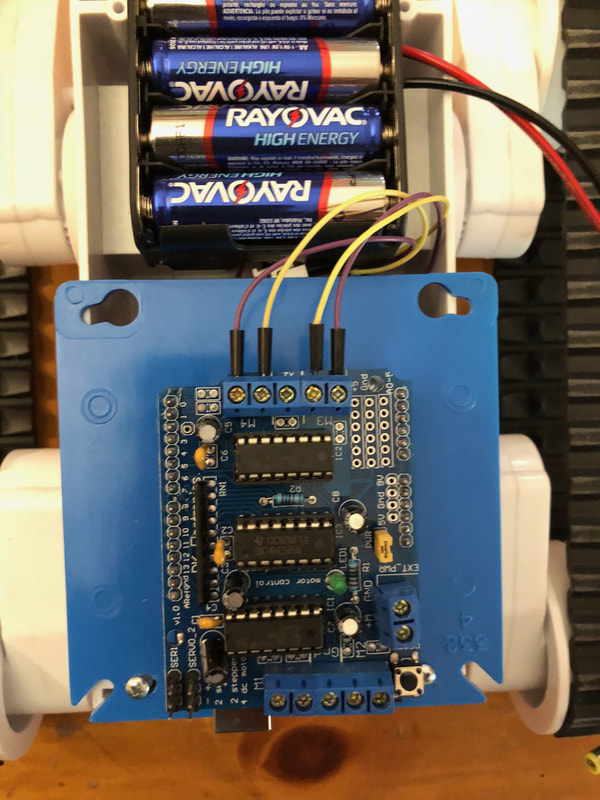
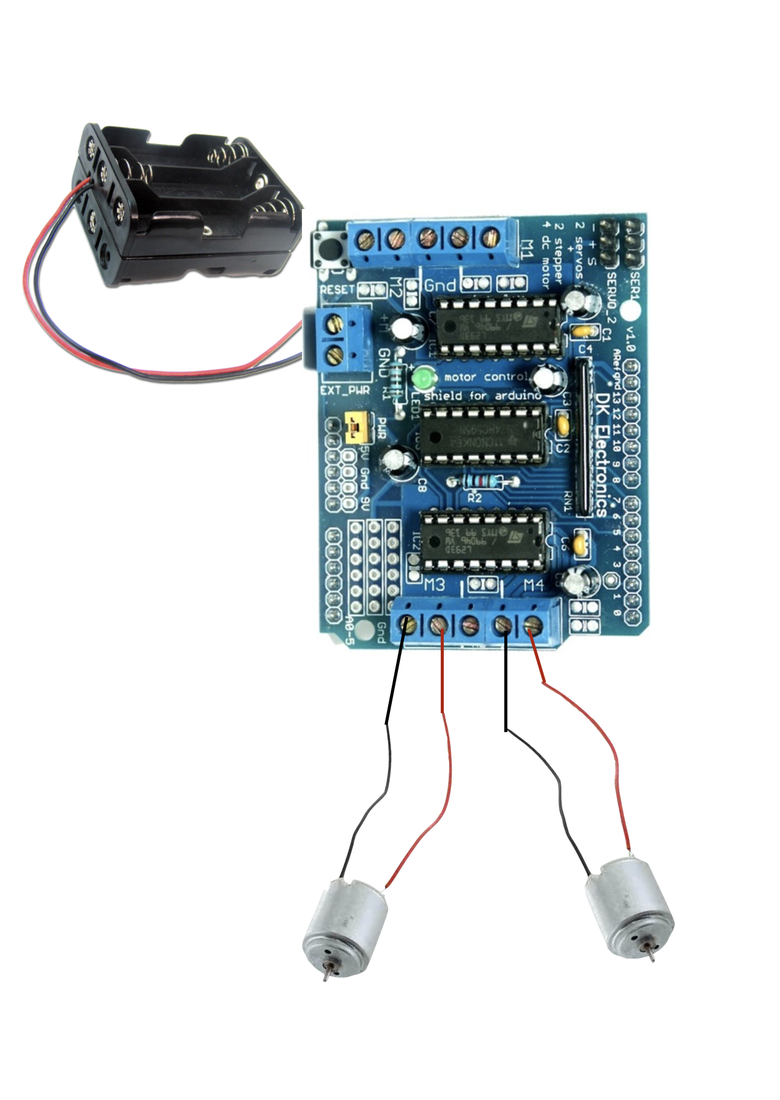
2. Attach the motor wires to the terminals on the motor shield at M3. Place the positive wire into the positive terminal and the negative into the negative terminal. You may need to use a jumper wire to extend and attach each motor to the motor shield.
3. Repeat previous step for the second motor, attaching at M4 of the motor shield.
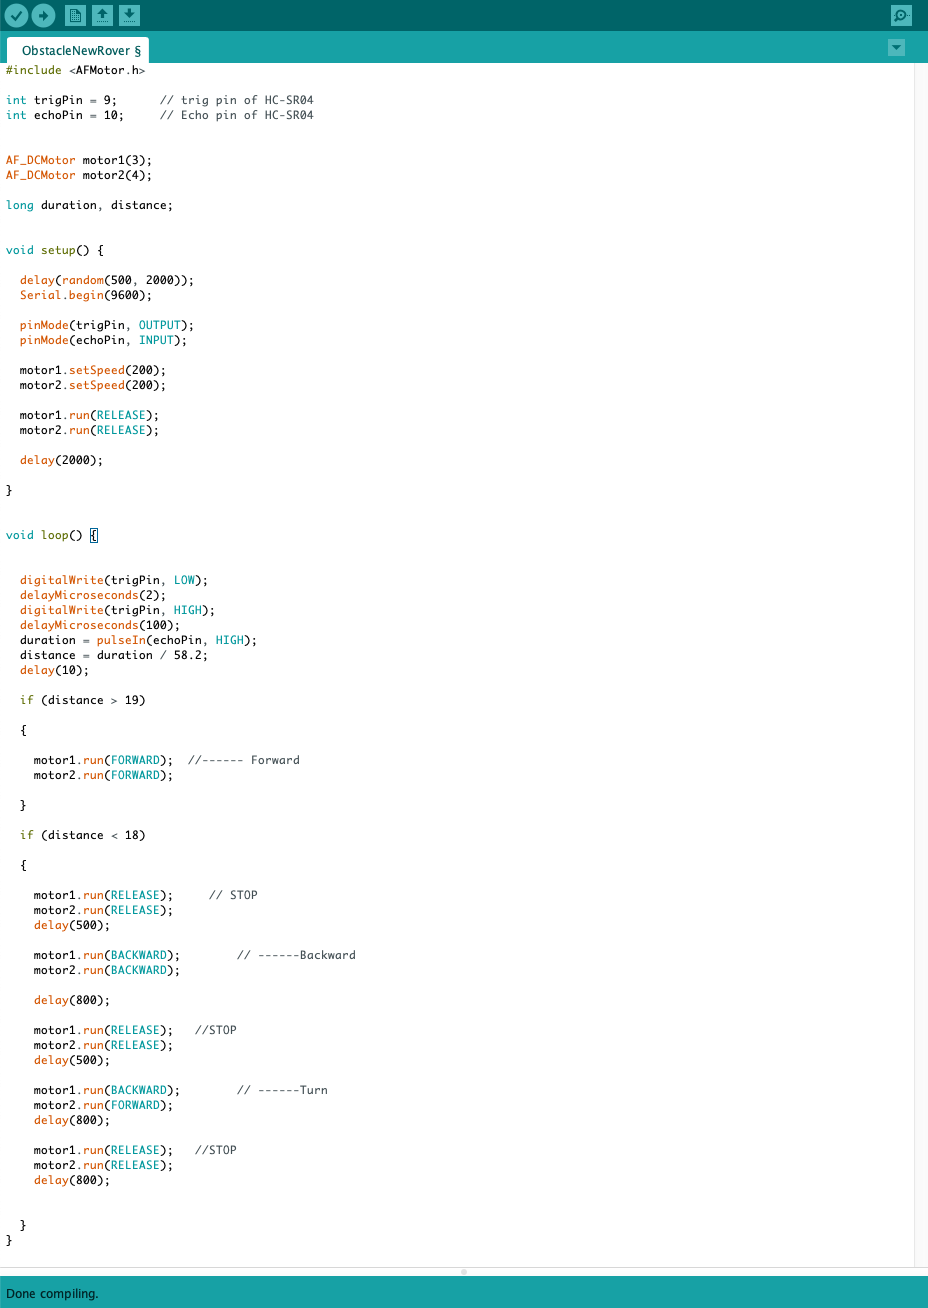
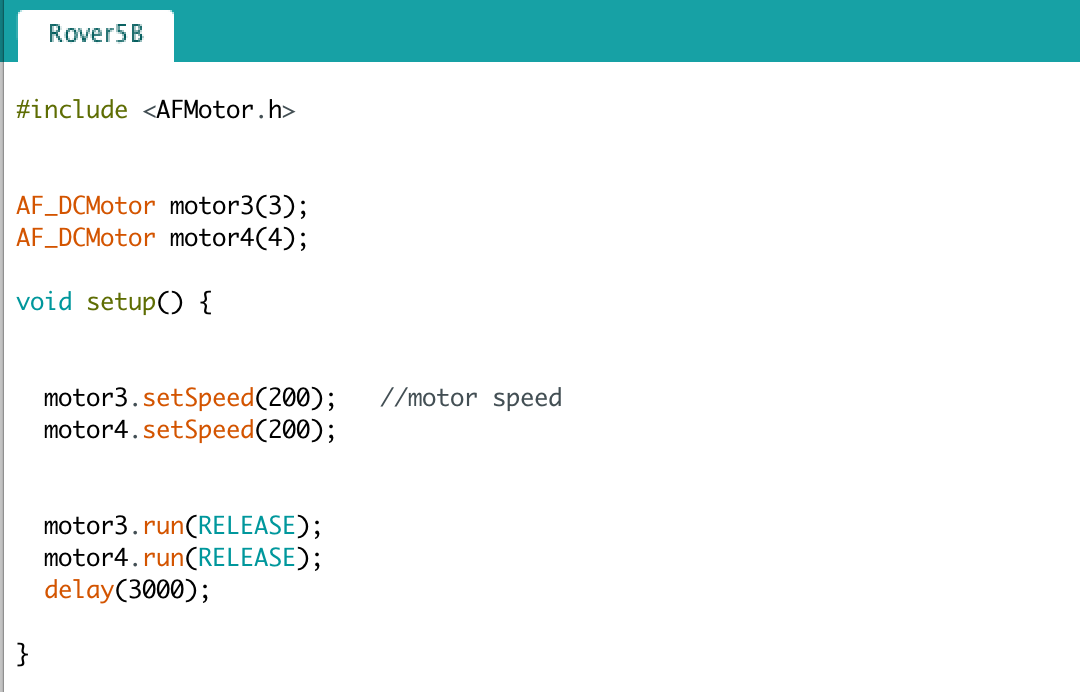
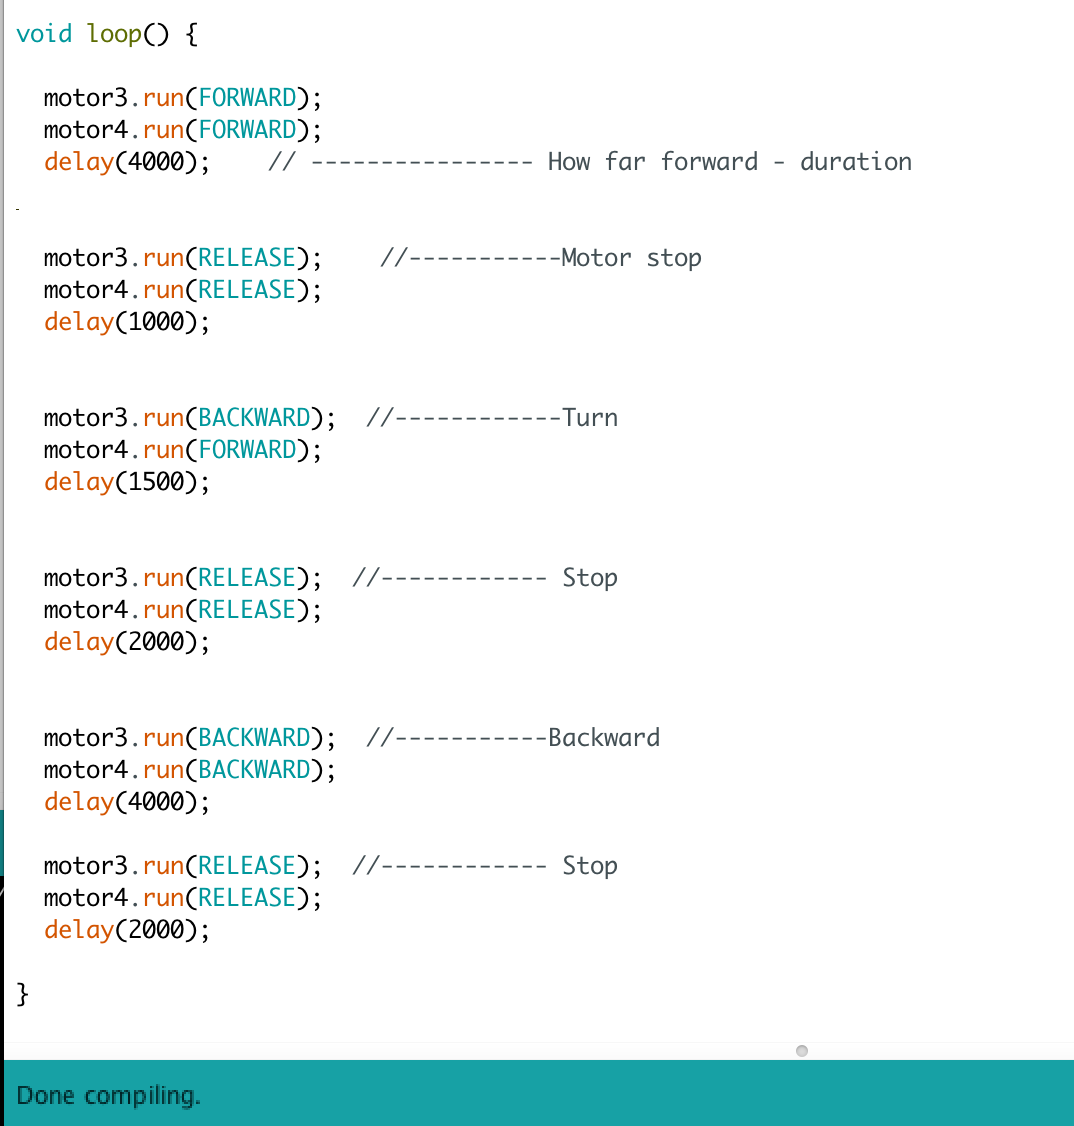
4. Open the Arduino IDE and type in the code as shown below. Then verify/debug your code by clicking on the checkmark.
5. Attach the battery either to the Arduino power jack or the external power terminal as shown.
6. Upload your code to the Arduino by clicking on the Arrow. (make sure the correct board is selected and the correct usb or com port is selected in the tools menu).
2. Attach the motor wires to the terminals on the motor shield at M3. Place the positive wire into the positive terminal and the negative into the negative terminal. You may need to use a jumper wire to extend and attach each motor to the motor shield.
3. Repeat previous step for the second motor, attaching at M4 of the motor shield.
4. Open the Arduino IDE and type in the code as shown below. Then verify/debug your code by clicking on the checkmark.
5. Attach the battery either to the Arduino power jack or the external power terminal as shown.
6. Upload your code to the Arduino by clicking on the Arrow. (make sure the correct board is selected and the correct usb or com port is selected in the tools menu).
|
|
|
|
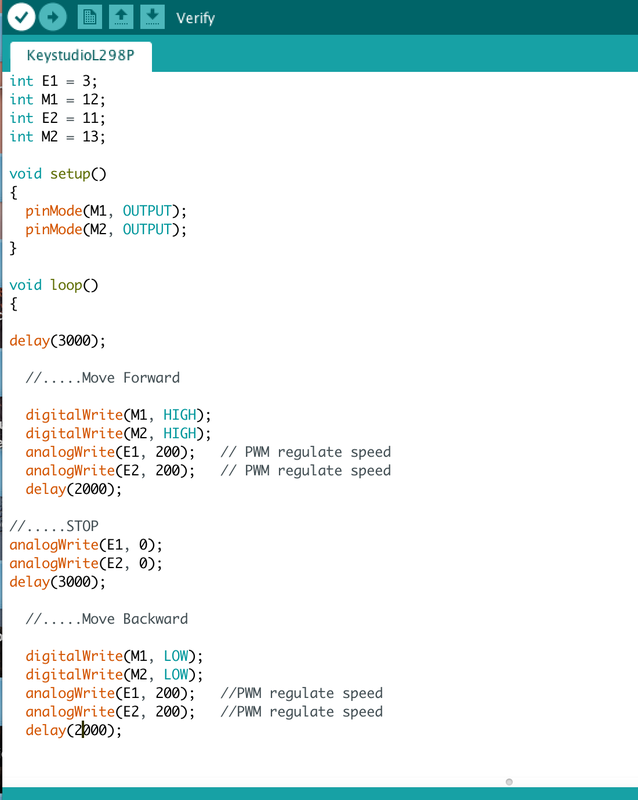
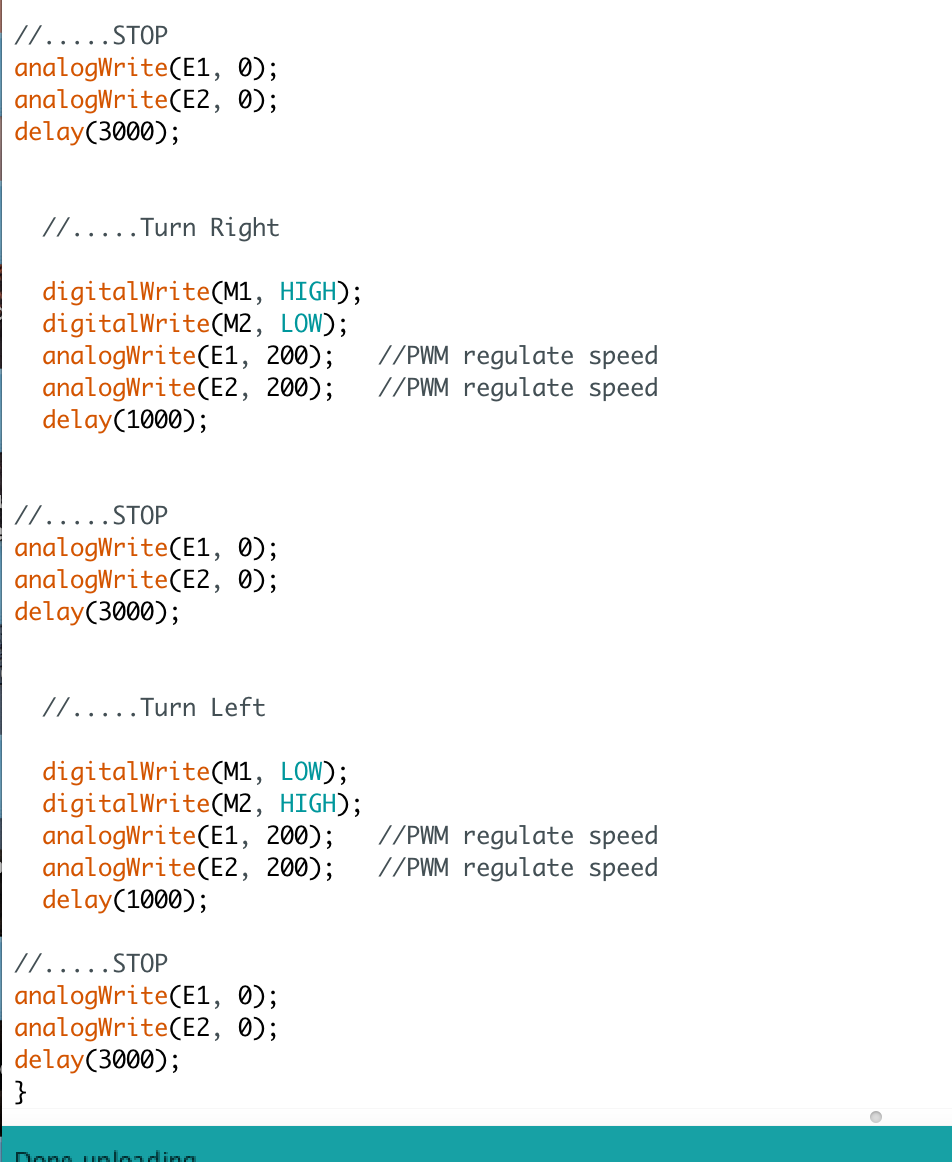
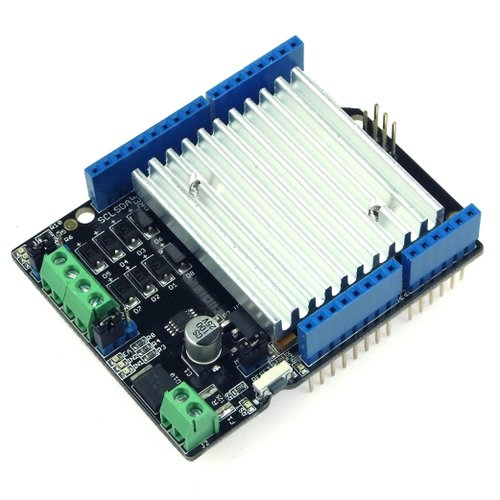
Alternative Motor Shield - L298P
Keystudio Super Uno Arduino |
Keystudio L298P Motor Shield |
Code for L298P
|
|
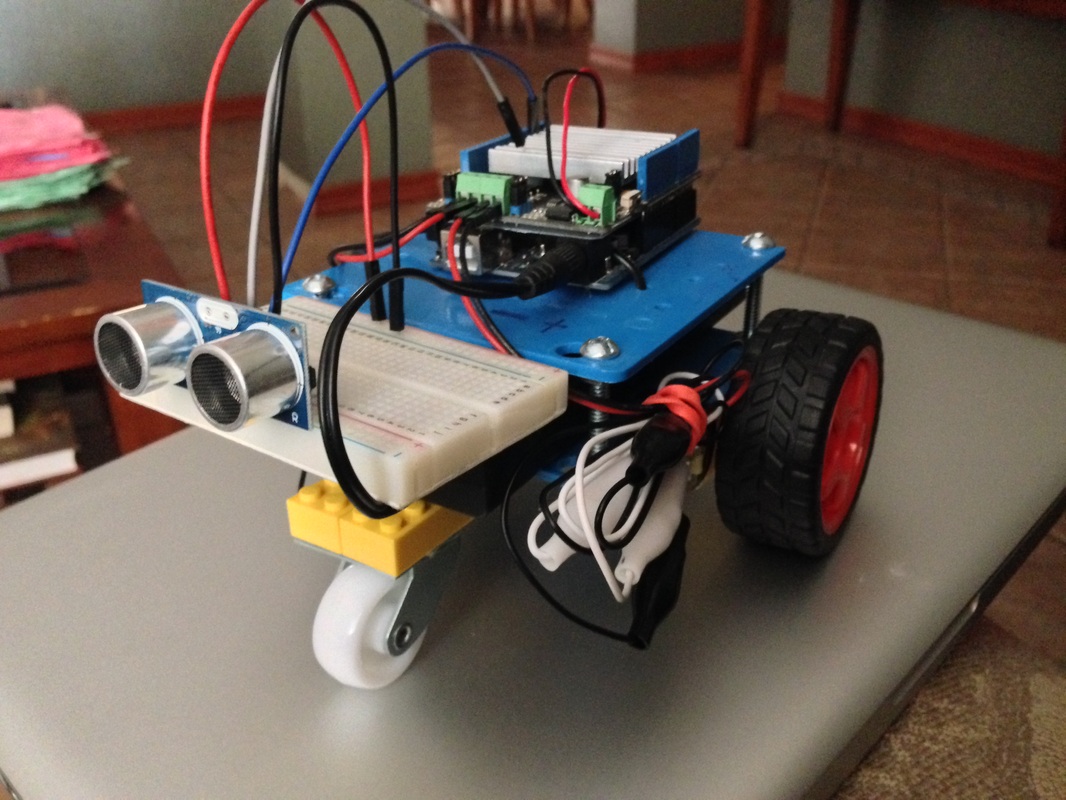
Constructing the DIY Chassis for Robot
Roving Robot
Build an autonomous roving robot with the Arduino Uno. Following the parts list and code, build the robot. Test the motors using the code on the page called motors. You will test the ultrasonic sensor and incorporate it into your robot to avoid obstacles. See the parts list below and code.
|
1 - Arduino Uno Micro Controller $25 (Amazon.com or Robotshop.com)
1 - Seeed Studio Motor Shield V2 $20 (Amazon.com or Robotshop.com) 1 - Set geared Motors $15 (Amazon.com or Radioshack) 2 - Square Plastic Electrical Box Covers $3.50 (Lowes or Home Depot) 4 - Jumper wires with alligator clip ends $3.50 (Amazon.com or Radioshack) Assorted Arduino jumper wires $1.00 (Amazon.com or Robotshop.com) 1 - Metal Ball Caster $3.00 (Amazon.com - Robotshop.com - Harbor Freight) |
1 - Bag of 4, 10x24x2 Machine screws with nut $3.00 (Lowes/Home Depot)
1 - Battery Holder 4xAA with barrel connector $3.00 (Amazon.com or Robotshop.com) 1 - Battery Holder 4xAA bare ends $2.00 (Amazon.com or Robotshop.com) 1 - Package Zip Ties $1.99 (Lowes/Home Depot) Approx. $85.00 with 7.4v Lipo Battery & charger Approx. $115.00 |
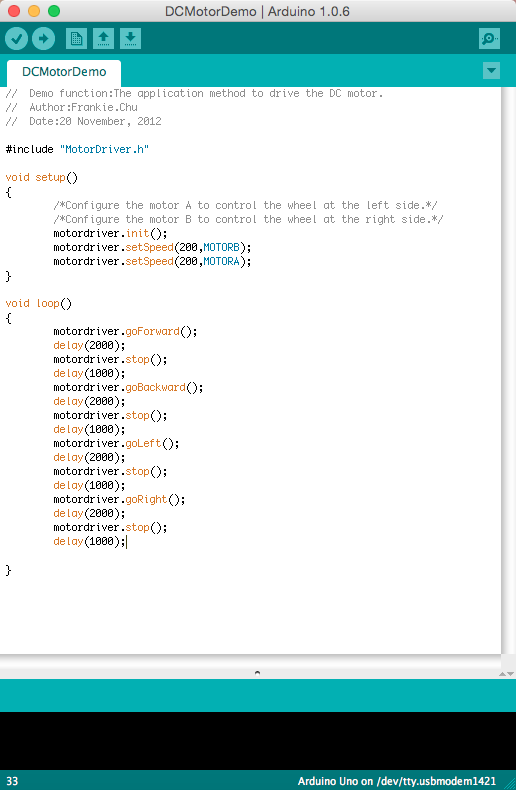
Below is the code used to test the Motors. Use this code and modify it to test the forward, back, left and right functions. It is ok to erase or add to it to see what results you'll get. Be sure you download the Motor Driver Library from Seeed Studio. Just go to their website and search for the motor shield V2 and you'll find the link to the correct wiki and then you'll find the link to download the motor library. (see tab on motors.)
Directional (Autonomous) Roving Bot
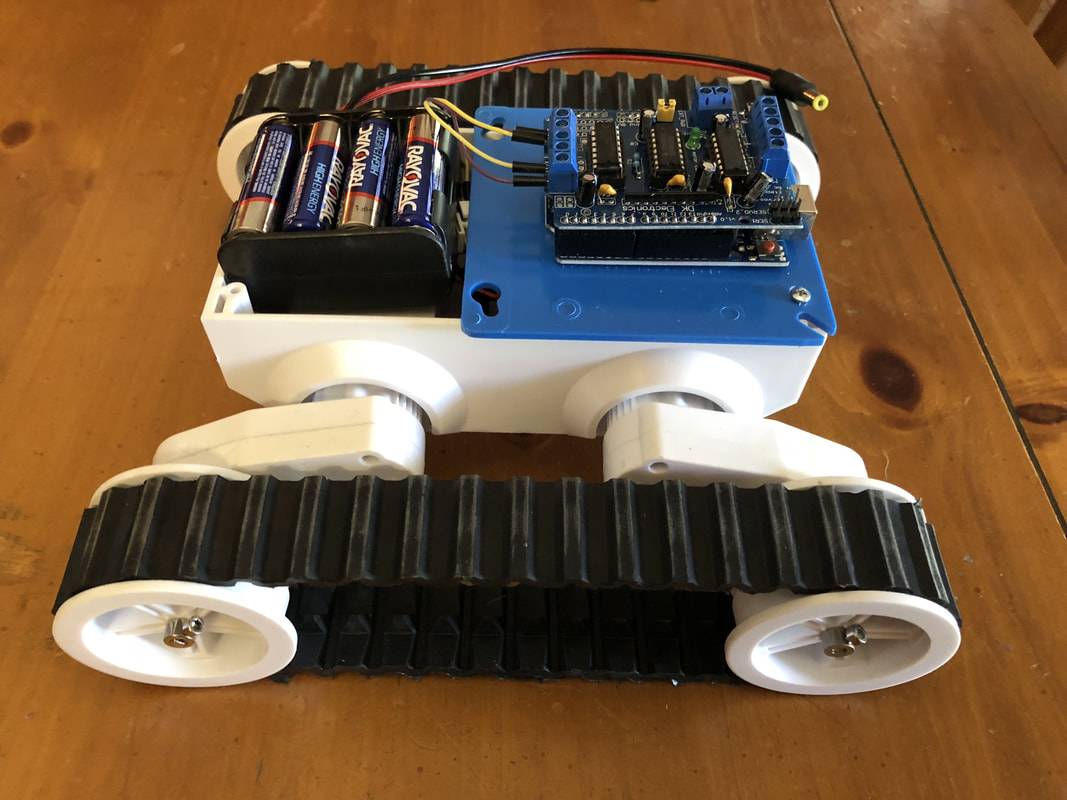
First construct a robot without the ultrasonic sensor. Use the pieces shown above. Instead of a circular electrical box cover, use a square cover. Build a simple chassis using 2 square covers and 4 10x24x2 Machine screws with nuts. Secure the motors under lower platform with hot glue or zip ties. Attach all electrical wires as shown in the Motors lesson previously. Then Practice with the Motor Driver code to make robot go different directions. Finally, place three obstacles on the ground and program your bot to maneuver around them.
Autonomous - Obstacle Avoiding Robot
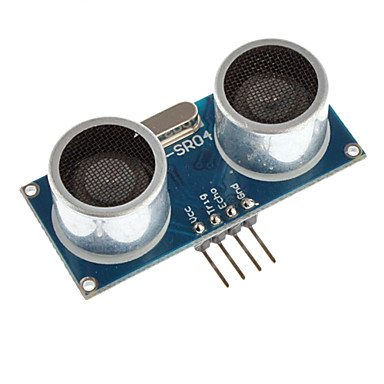
Next - Review Ultra Sonic Sensor code from previous projects.
Final Robot Code for Rover with UltraSonic Sensor obstacle avoiding capabilities.
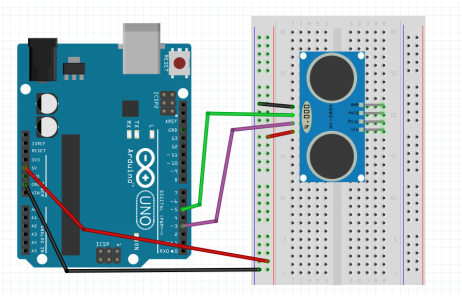
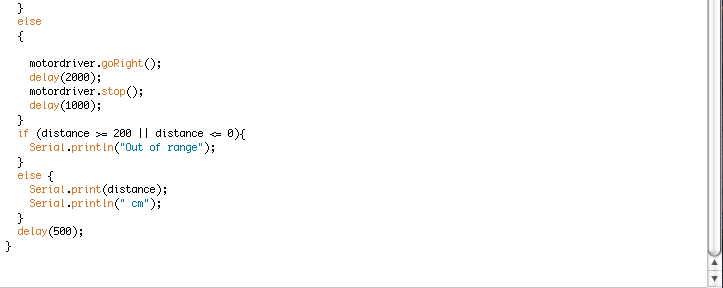
Once you've experimented with movement and direction and understand how an Ultrasonic Sensor work, follow the Fritzing Sketch to wire everything up correctly. Also use the pictures provided. Then copy or type in the code below that combines the motor driver code with the Ultra Sonic sensor code. Notice the important parts are the "if" and "else" statements. These tell the Arduino micro controller to make the robot go forward until it reaches an obstacle 10 cm away. Then turn right. if robot senses object at < 10 cm else turn right. The word "else" mean "then do".

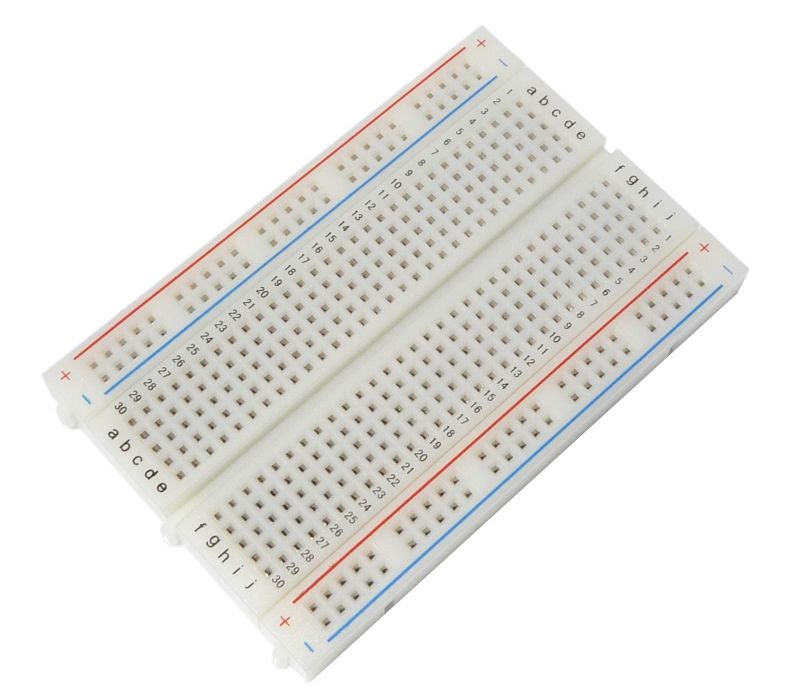
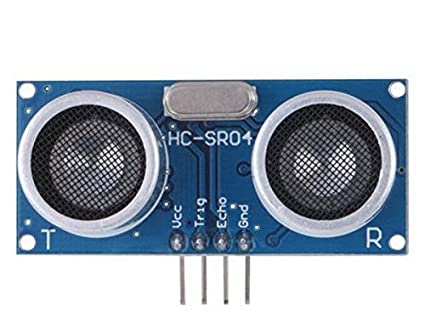
Ultrasonic Sensor - Attach the Sensor to the Arduino using a small breadboard. Use the instructions in the code to see which pins will be for Echo and Trig. Follow the code. You will use the pins that are located on the Motor Shield board that is connected on top of the Arduino Uno.
|
|
After you copy code, make sure all connections are correct. Set up some obstacles. Attach batteries and give it a try.
You will notice that the robot stops after a few centimeters and then continues. Why? How can we eliminate that pause.
If your bot is not moving and you hear noise or your bot goes way too slow, try increasing the power by adding batteries. You can either have a 7.1 Lipo battery directly to the barrel jack connector or add additional batteries to the power connectors on the Motor shield next to the connectors that send power to the two motors.
If you are using the L293D Motor Shield from OSEPP or Adafruit. Use the code below. It is better to use the OSEPP brand because it comes with the headers that allow you to use the digital pins. The blue Adafruit one does not.
|
OSEPP Brand L293D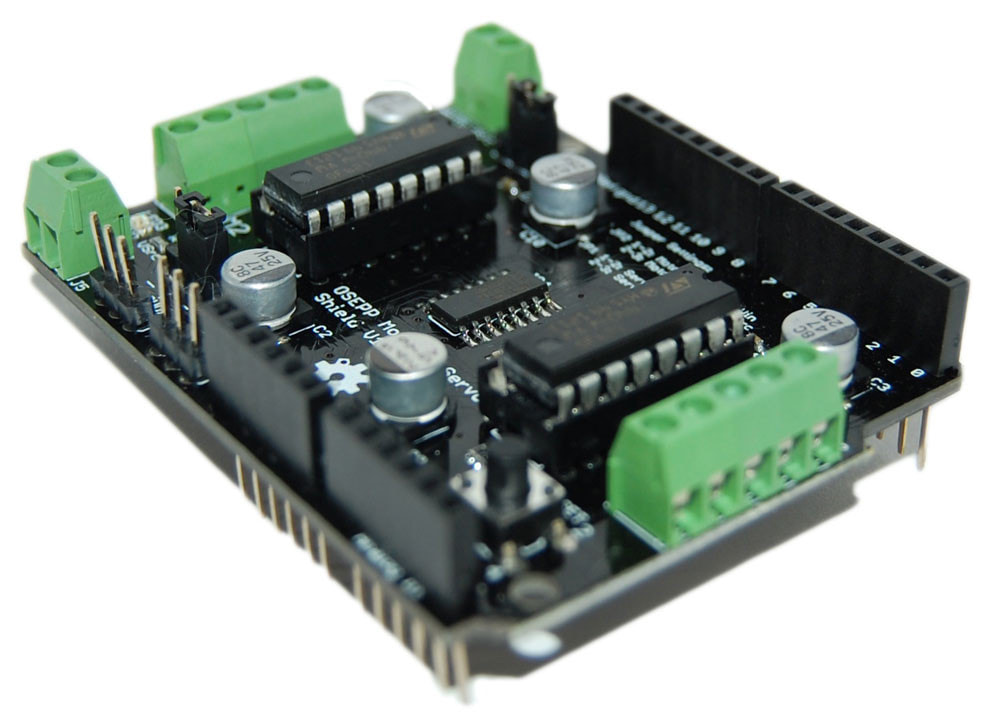
|
Adafruit L293d Chinese Made Clone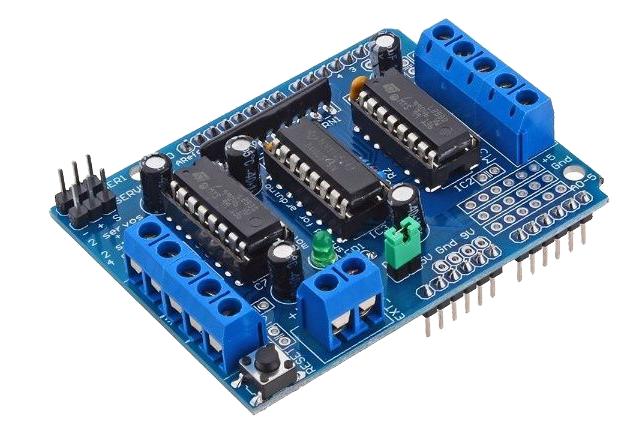
|