Microbit Dice
Microbit Hello #1


|
Getting Started:
1. Connect microbit to usb port. Follow any directions that appear on the Microbit Screen. Then look on your desktop to see if the Microbit Icon mounted. It will look like a USB drive. 2. Go to https://makecode.microbit.org and begin a New Project. 3. Use the coding interface to create code as shown. 4. When done, Name Your Code and download the code. The code will save to your downloads folder. 4. Drag the code you downloaded from your downloads folder to the Microbit drive. Then wait for it to load onto your Microbit. |
Microbit Hello #2 (one LED)


|
Getting Started:
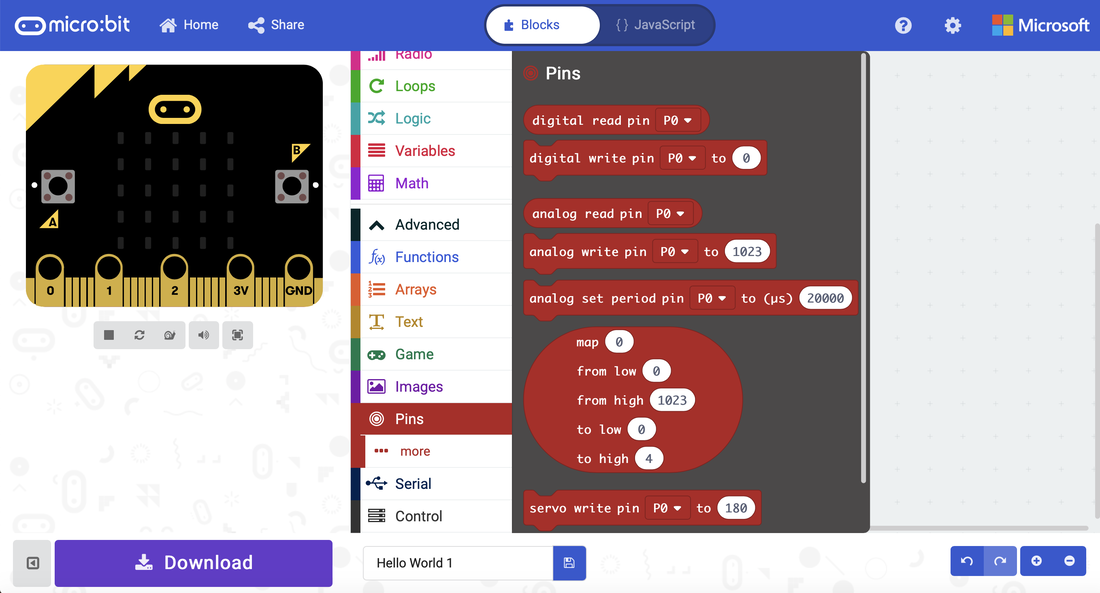
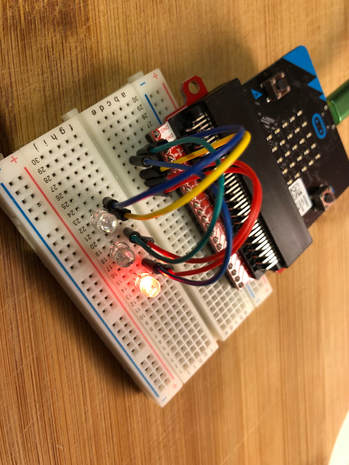
1. Connect microbit to usb port. Follow any directions that appear on the Microbit Screen. Then look on your desktop to see if the Microbit Icon mounted. It will look like a USB drive. 2. Wire the project as shown. 3. Go to https://makecode.microbit.org and begin a New Project. 4. Use the coding interface to create code as shown. Be sure to select the code blocks for PINS. Select Pin 1. When using digital write Pins, 1 = ON and 0 = OFF. Place a Pause Block in between the Digital Write blocks. You can set it to 100 microseconds or 1 second. 5. When done, Name Your Code and download the code. The code will save to your downloads folder. 6. Drag the code you downloaded from your downloads folder to the Microbit drive. Then wait for it to load onto your Microbit. |
Microbit #3 - 3 LED's
|
Getting Started:
1. Connect microbit to usb port. Follow any directions that appear on the Microbit Screen. Then look on your desktop to see if the Microbit Icon mounted. It will look like a USB drive. 2. Wire the project as shown. 3. Go to https://makecode.microbit.org and begin a New Project. 4. Use the coding interface to create code as shown. Be sure to select the code blocks for PINS. When using digital write Pins, 1 = ON and 0 = OFF. Place a Pause Block in between the Digital Write blocks. You can set it to 100 microseconds or 1 second. You will need to use three Pin Blocks. Name them P0 P1 P2. Click on the picture below to enlarge and see code. 5. When done, Name Your Code and download the code. The code will save to your downloads folder. 6. Drag the code you downloaded from your downloads folder to the Microbit drive. Then wait for it to load onto your Microbit. 

|

|
Microbit #4 - Music with Buzzer


|
Getting Started:
1. Connect microbit to usb port. Follow any directions that appear on the Microbit Screen. Then look on your desktop to see if the Microbit Icon mounted. It will look like a USB drive. 2. Wire the project as shown. 3. Go to https://makecode.microbit.org and begin a New Project. 4. Use the coding interface to create code as shown. Be sure to select the code blocks for MUSIC. Set the Play Tone blocks as shown. You can place Pause Blocks in between if you want to slow notes down. Click on the picture below to enlarge and see code. 5. When done, Name Your Code and download the code. The code will save to your downloads folder. 6. Drag the code you downloaded from your downloads folder to the Microbit drive. Then wait for it to load onto your Microbit. |
Microbit #5 - Servo


|
Note: You may experience jittery or unresponsive servos. This section is still in progress.
Getting Started: 1. Connect microbit to usb port. Follow any directions that appear on the Microbit Screen. Then look on your desktop to see if the Microbit Icon mounted. It will look like a USB drive. 2. Wire the project as shown. 3. Go to https://makecode.microbit.org and begin a New Project. 4. Use the coding interface to create code as shown. Be sure to select the PINS code blocks and the Servo Write blocks as shown. Place Pause Blocks in between as shown. Click on the picture below to enlarge and see code. 5. When done, Name Your Code and download the code. The code will save to your downloads folder. 6. Drag the code you downloaded from your downloads folder to the Microbit drive. Then wait for it to load onto your Microbit. |
