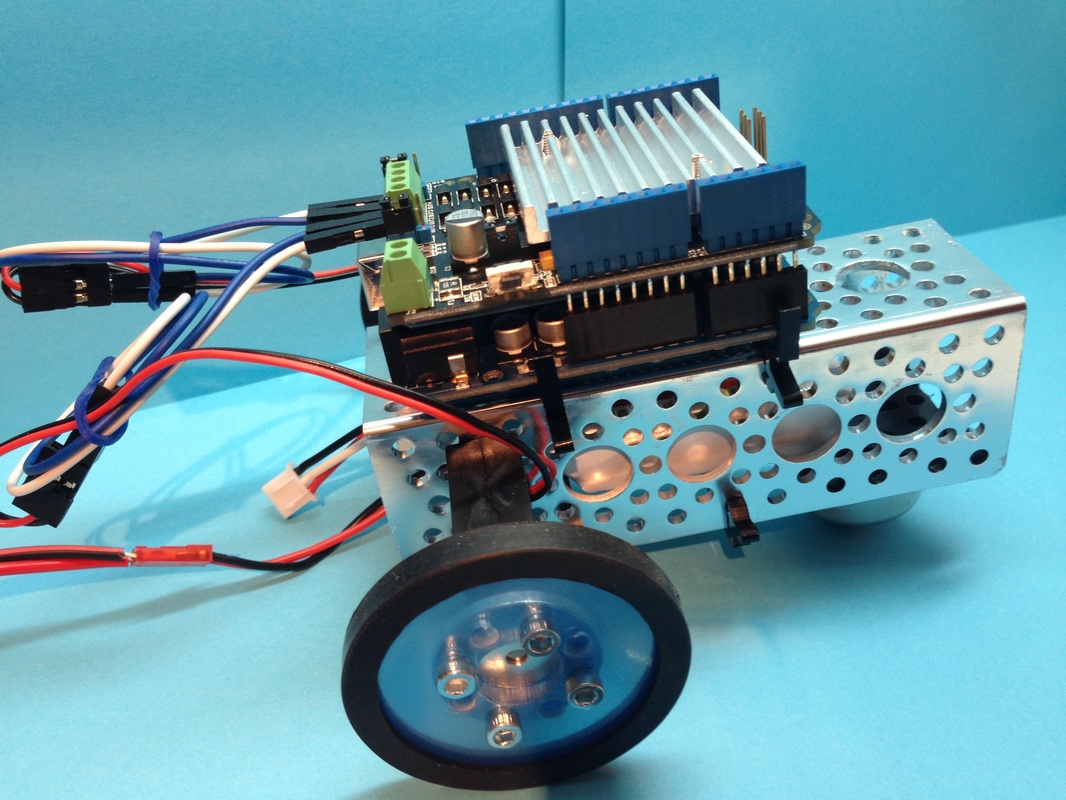
Completed basic Actobitty Robot for programming task based objectives. Modified with a different ball caster in front. This uses the same Arduino and Seeedstudio Motor shield V2 as in previous projects. This kit comes with a (4) AA Battery holder with barrel jack. I have modified this bot with a 7.4v 1200mAh Lipo battery with an attached barrel jack.
|
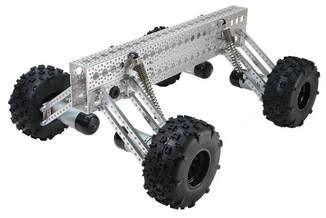
The Actobitty2 robot kit has all the parts to build the platform. It includes the platform, motors, wheels, battery holder and brackets to mount an Arduino Uno Rev3 Microcontroller.
*For my class, this will be the platform used for future robotic task based competitions. *See Slides 2, 3 & 4 to under the Sainsmart driver photo to see how to connect motors to motor driver shield. Available through: Sparkfun.com Amazon.com Robotshop.com Servocity.com |
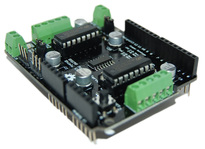
Below are three different motor shields I have used in my classroom. I use either the SeeedStudio Motor Shield V2, the OSEPP Motor and Servo Shield or the SainSmart L293D Motor Driver Shield.
Each one uses a particular motor driver library that should be downloaded and placed in the libraries folder within the Arduino folder on your computer.
Below you will find a link to download each of the library files. If using the Seeedstudio Shield, you will Download the Motordriver.h file from the Seedstudio website and declare "Motordriver.h" in your sketch. If you are using the OSEPP motor shield or SainSmart Motor driver , you will download the AFMotor.h file from Sparkfun or Github declare "AFMotor.h" in your sketch. See the download addresses below.
Seeedstudio Motor Shield V2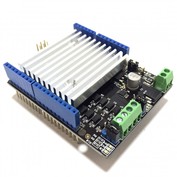
|
|
|
http://www.seeedstudio.com/wiki/File:MotorDriver20121210.zip
|
https://github.com/adafruit/Adafruit-Motor-Shield-library
|
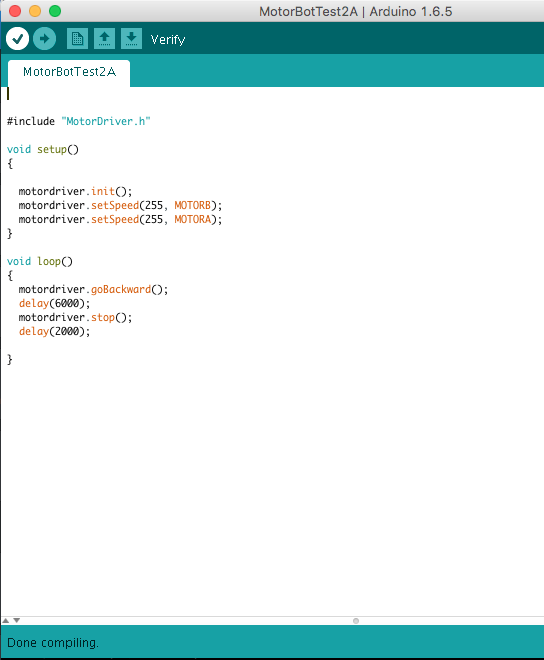
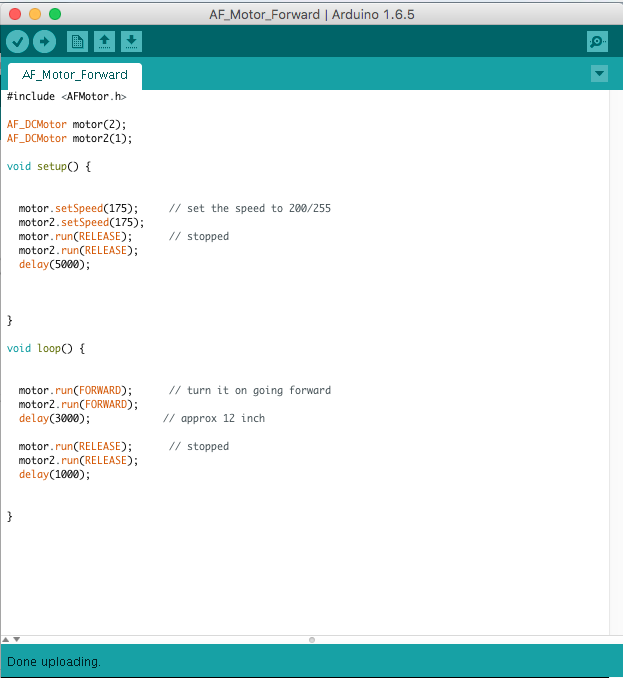
Examples of basic code to move forward
|
MotorDriver.h library
|
AFMotor.h library
|
Examples of basic code to move forward, backward, left and right
|
Other Motordriver libraries may be different and look different like the code below.
goForward, goBackward, goLeft, goRight and stop.
You must always include a delay( ) command and a motor driver.stop command. As shown above. 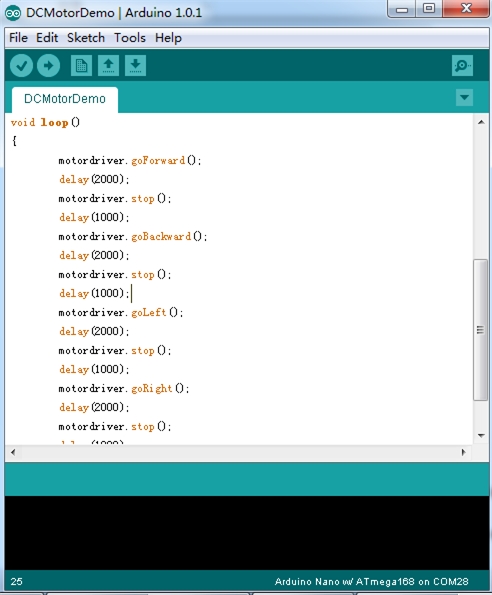
|
The "AFMotor.h" code only has two directional commands; FORWARD and BACKWARD.
To go left or right you will need to only command one of your wheels to move or have each move in the opposite direction to go left or right. For example; to go left, only the left wheel will move BACKWARD. To go right, only the right wheel will move BACKWARD. If you find that your robot is not turning well with only one wheel, then try having both wheels turn in opposite directions. You will need to always write the command for the the wheel to stop by adding the motor.run(RELEASE); command along with a delay command. (See example above) |
Power
The Actobitty2 kit comes with a battery holder that accepts 4 double AA batteries. You will find that this powers everything, but goes relatively slow.
I like to use a 7.4 1200mAh or 800mAh Lipo Battery with a barrel jack adapter. This gives the robot more power or current. This makes the robot go twice as fast.
I like to use a 7.4 1200mAh or 800mAh Lipo Battery with a barrel jack adapter. This gives the robot more power or current. This makes the robot go twice as fast.
Battery Pack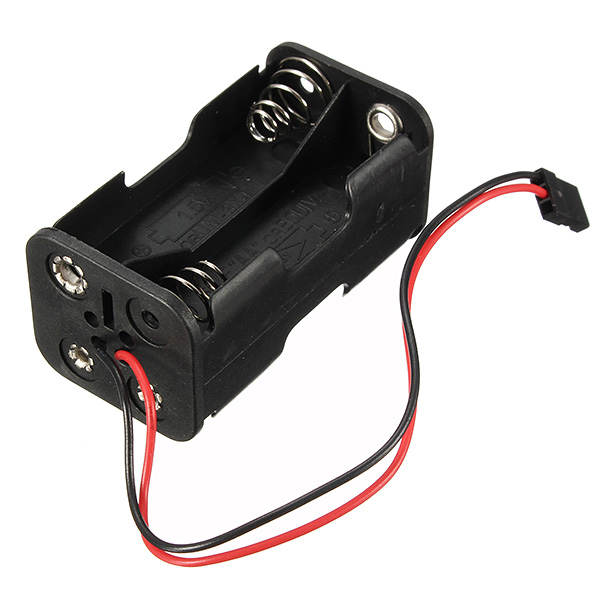
|
7.4v 20C 1000mAH Lipo Battery (rechargeable)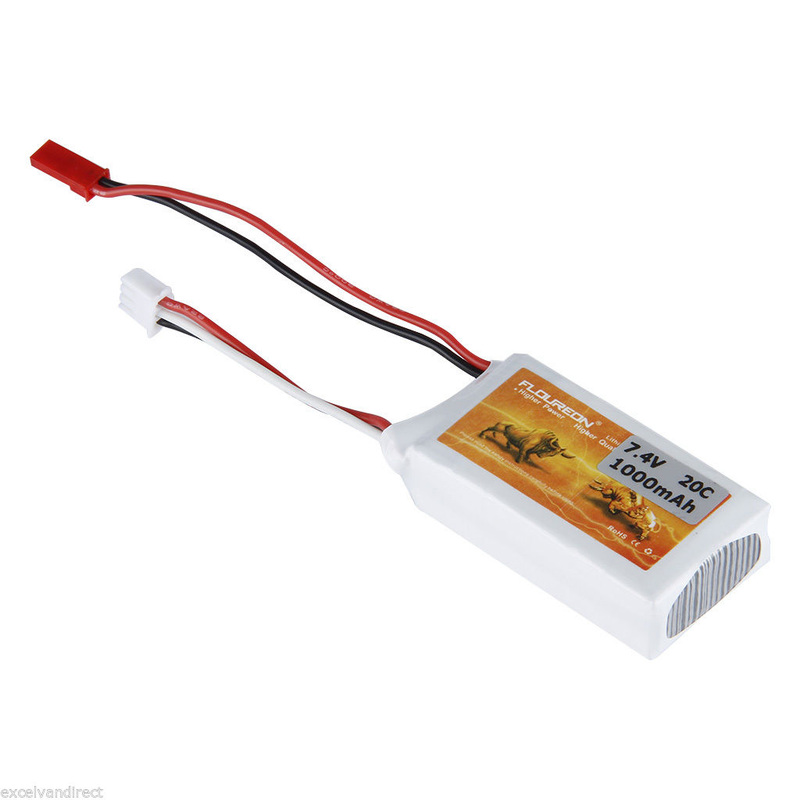
|
Lipo 2 cell - 3 cell Battery Charger

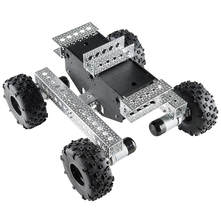
Whippersnapper Runtrover - Nomad - 4WD Mantis Rover - Assembly Videos

Whippersnapper Runtrover
|
Mantis Robot
|
|
|
|
Nomad Robot
Program Sketch for 4 Wheel Movement (Runt Rovers Only)
- The program sketch below gets you started in making your four wheeled robot move FORWARD.
- Make sure you have the AF_Motor library installed. Go to the menu "Sketch" "Include Library" "Manage Libararies" type in AF Motor and install the version 1 and version 2 just to be sure.
- Later experiment with your code to make your robot go "BACKWARD" then left and right. Remember to turn your robot you need to turn the right side one direction and the left side the opposite direction.

|
Motor Driver Shield Wiring Diagram
|

|
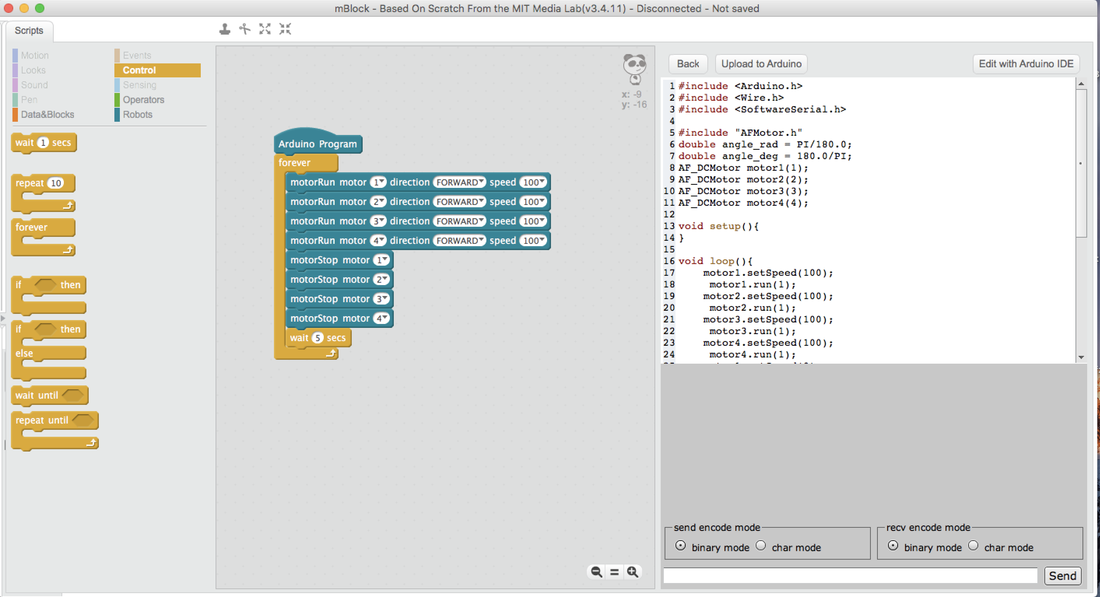
mBlock ProgrammingUse the examples below to program the robot using mBlock Block Coding Software.
|
|
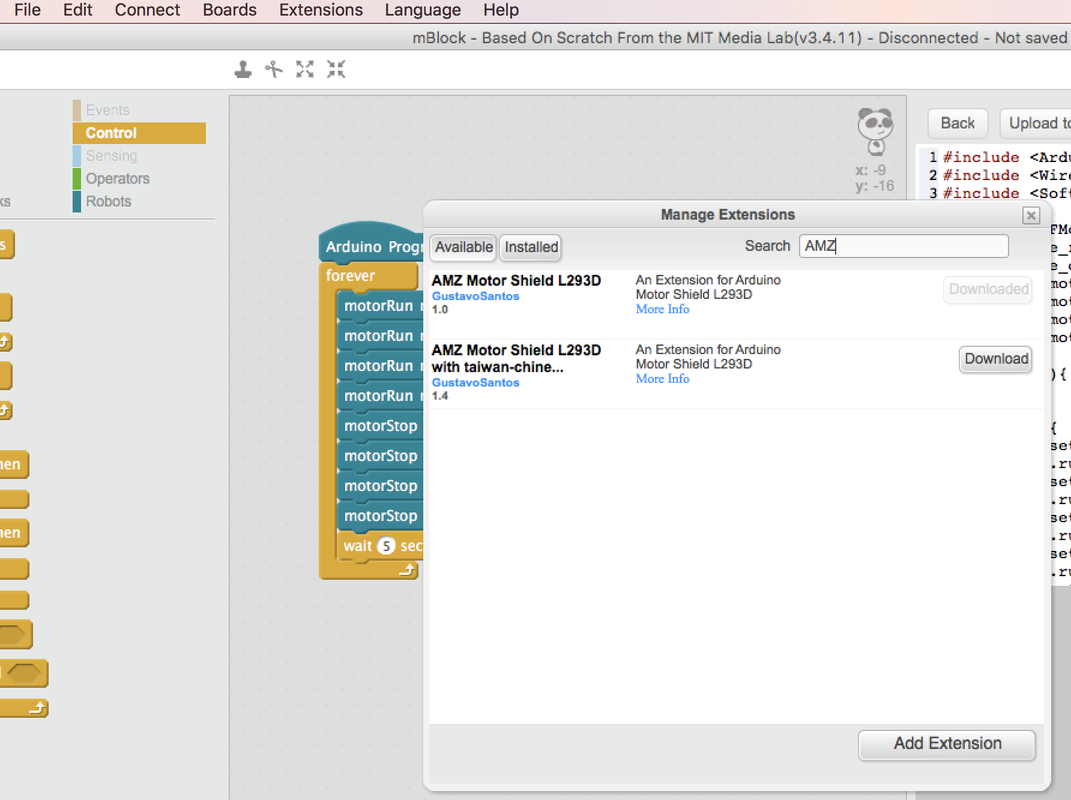
1. Open the mBlock Program. Switch to Arduino Mode by going to the Edit menu and selecting Arduino Mode. Then go to Extension Menu. You need to install the AMZ Motor Shield L293D if it does not appear like the example. To install it see the next picture.
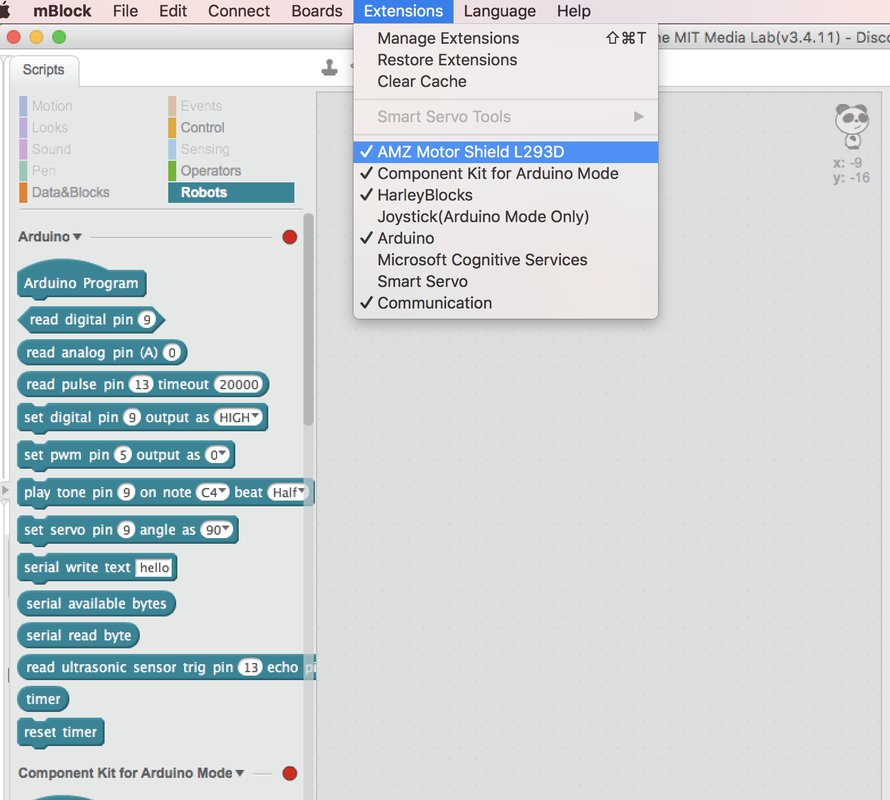
3. Next, type in AMZ in the search box that appears. Select the first one titled AMZ Motor Shield L293D and click on download and add extension. If you select the other one it may appear with Chinese letters. Once it's finished downloading, close that search window.
|
2.
Go to Extensions menu and click on Manage Extensions. 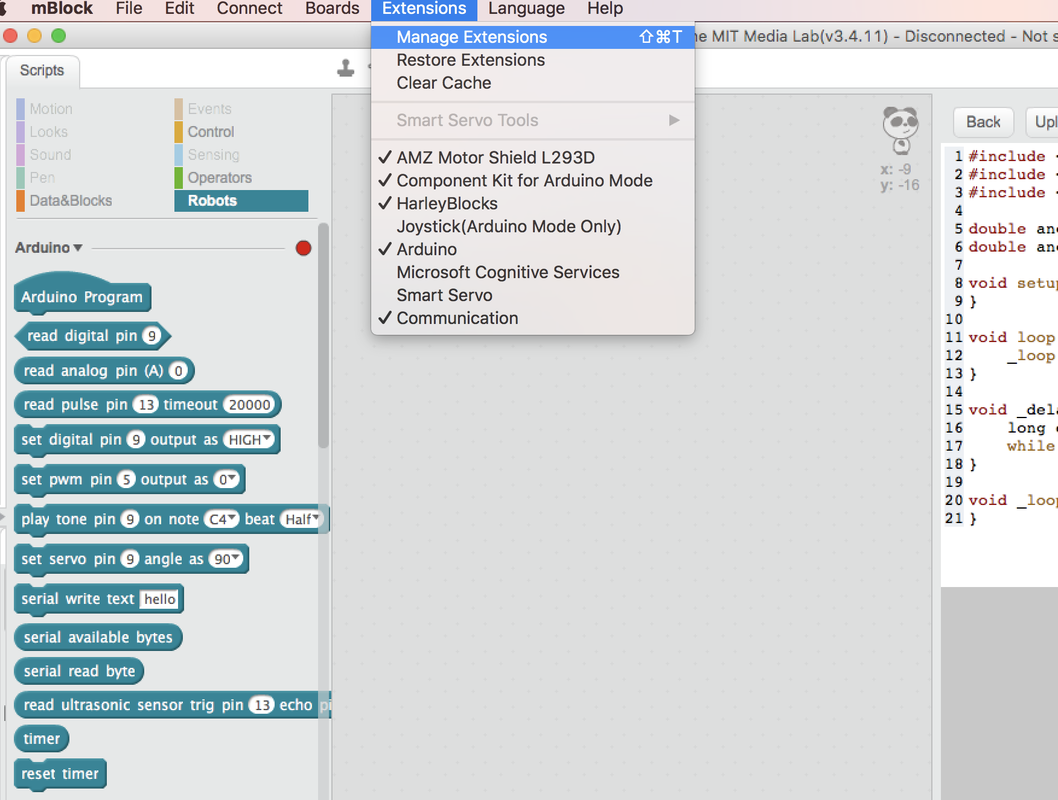
|
Programming Movement with mBlock
After you've wired the robot as shown above and installed the AMZ Motor Shield Extension then your are ready to code. Select the correct blocks as shown. Then when ready upload the program to the robot. Be sure to check the connection by going to the connect menu - serial port - usb.
Nomad/Mantis - Motor Control
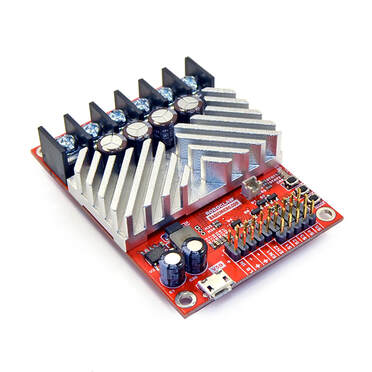
For the Nomad and Mantis Actobotics Robots we are Using Remote Control instead of Code. We are using the RoboClaw 2x30A Motor Controller
and a RC Receiver and Transmitter. In addition we are using a floureon 7.4V 2S 3300mAh 35C Li-Polymer Lipo RC Battery.
and a RC Receiver and Transmitter. In addition we are using a floureon 7.4V 2S 3300mAh 35C Li-Polymer Lipo RC Battery.
|
RC Receiver & Transmitter
|
7.5v 3300mAh Lipo Battery

|
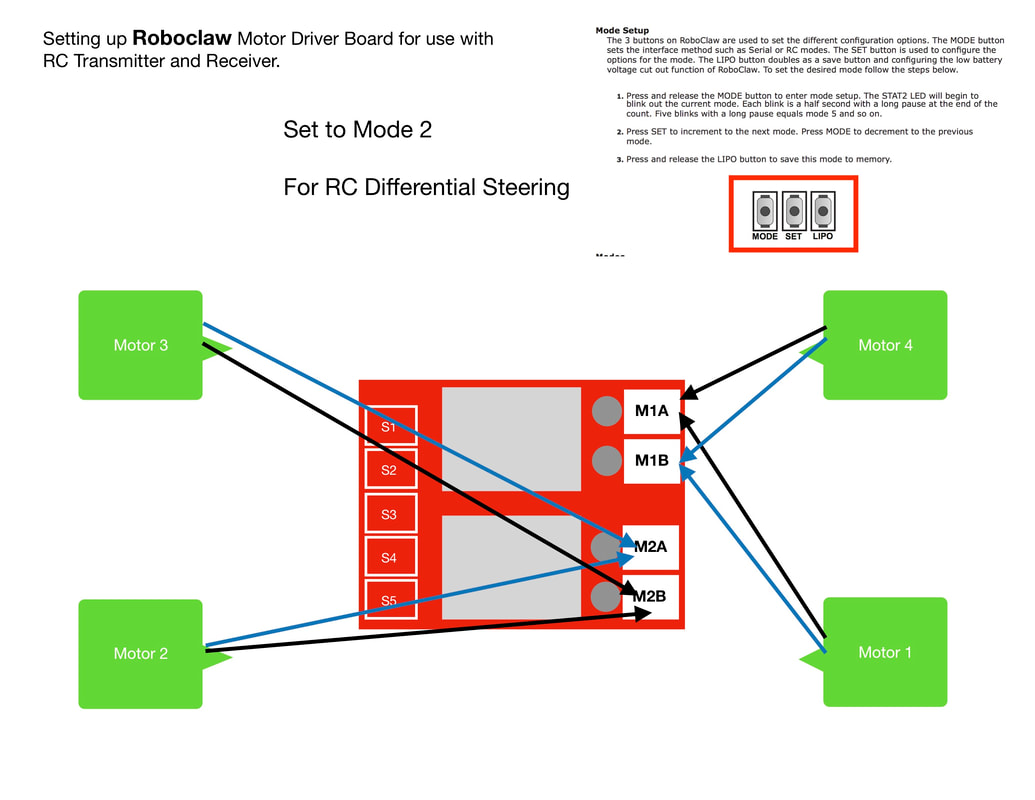
How to connect motors to RoboClaw 2x30A Motor Controller
|
Roboclaw 2x30A Motor Controller
|
Motor Connection Diagram
|
