Juno Autonomous Robot

|
The Juno Autonomous Robot is a variation of the Juno Robot found on Thingiverse at https://www.thingiverse.com/thing:1720394 .
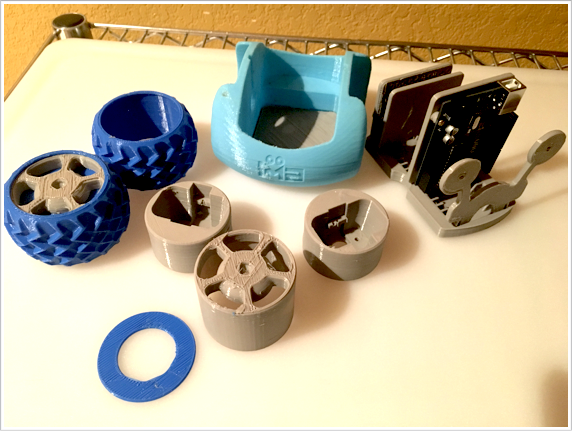
In this variation the Juno Robot is programmed using the Arduino C language structure or the mBot Scratch coding to move autonomously. The original Thingiverse version is for use with a bluetooth module to program and drive with an app. See link for bluetooth instructions. 1. 3D Print Parts- 3D print all parts and construct the Juno Robot. Go to https://www.thingiverse.com/thing:1720394 for instructions on how to assemble.
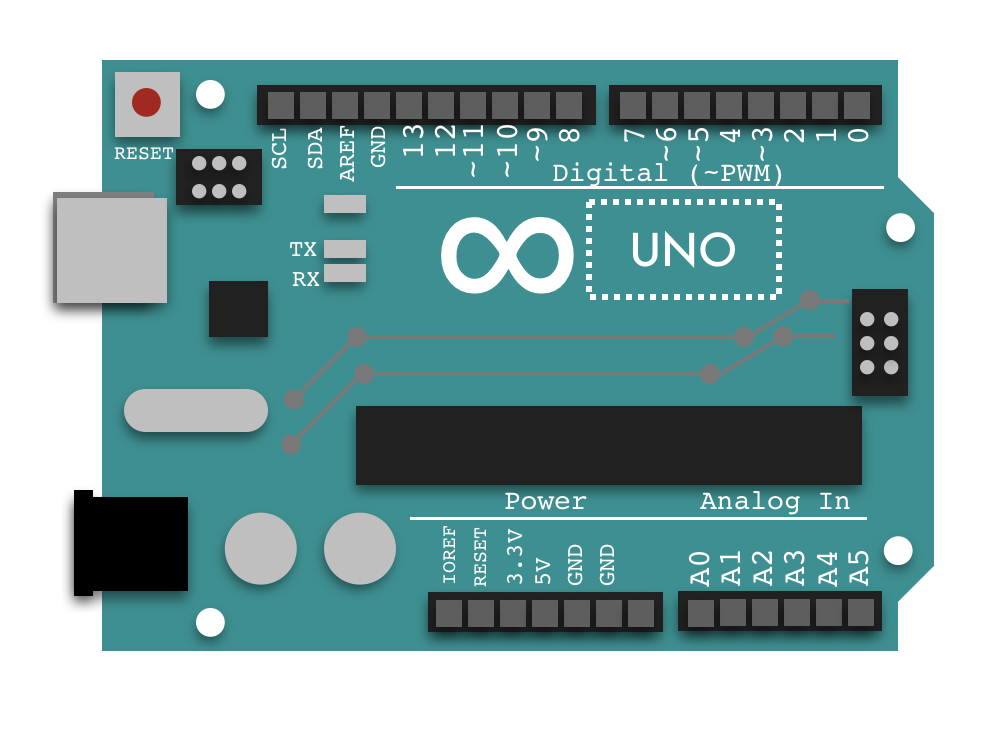
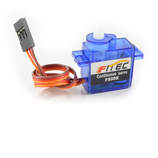
- Assemble all parts as shown in the instructions. (Instruction file all available below). 2. Additional Parts- You will need an Arduino Uno and 2 continuous rotation mini servos.
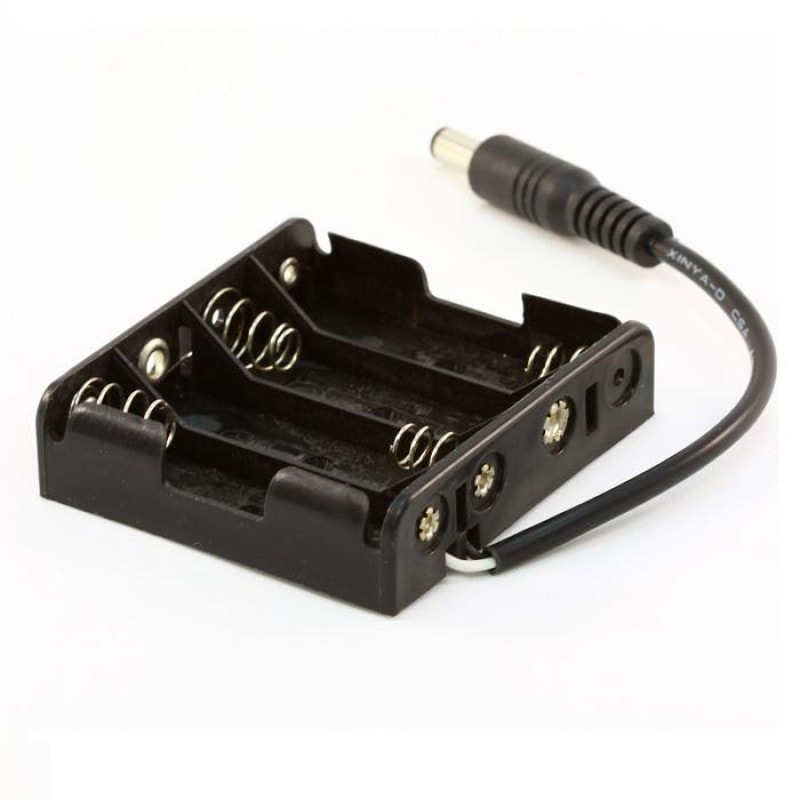
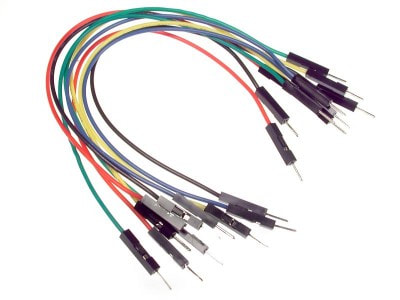
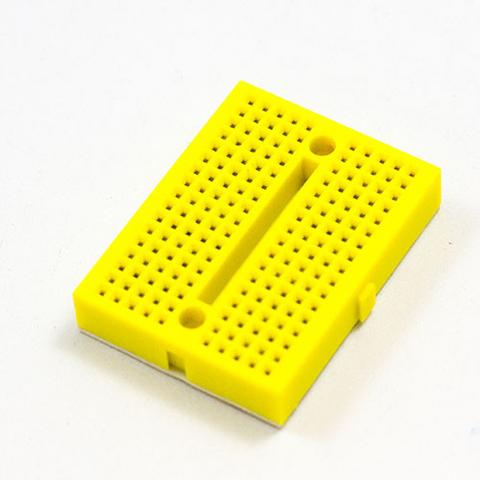
- 2 LED's - 1 Small Bread Board - 10-12 Jumper wires. - AA Battery pack or 1 9V battery with barrel jack connector.
| ||||||

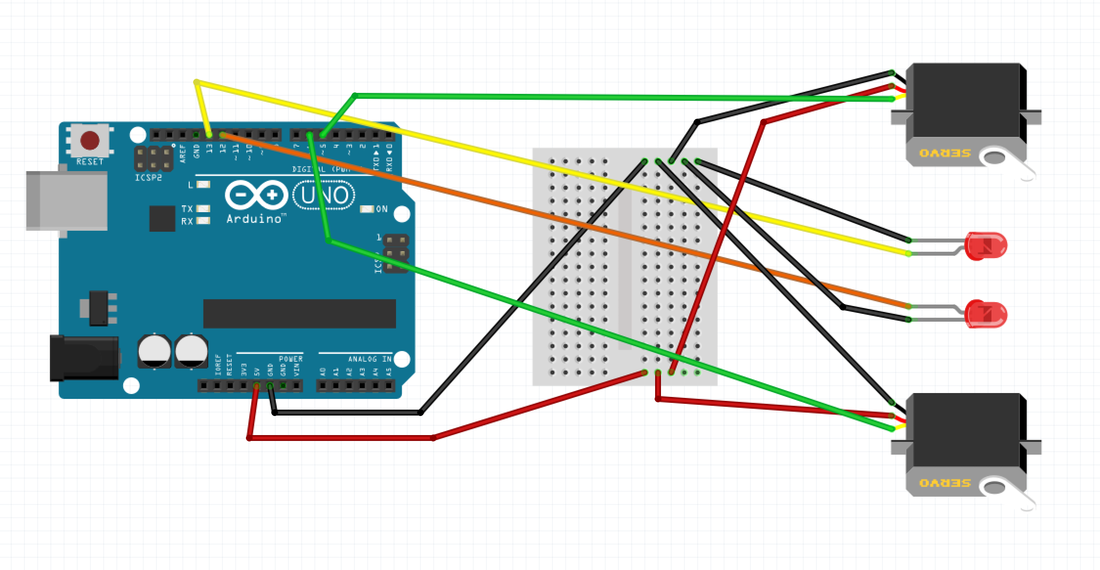
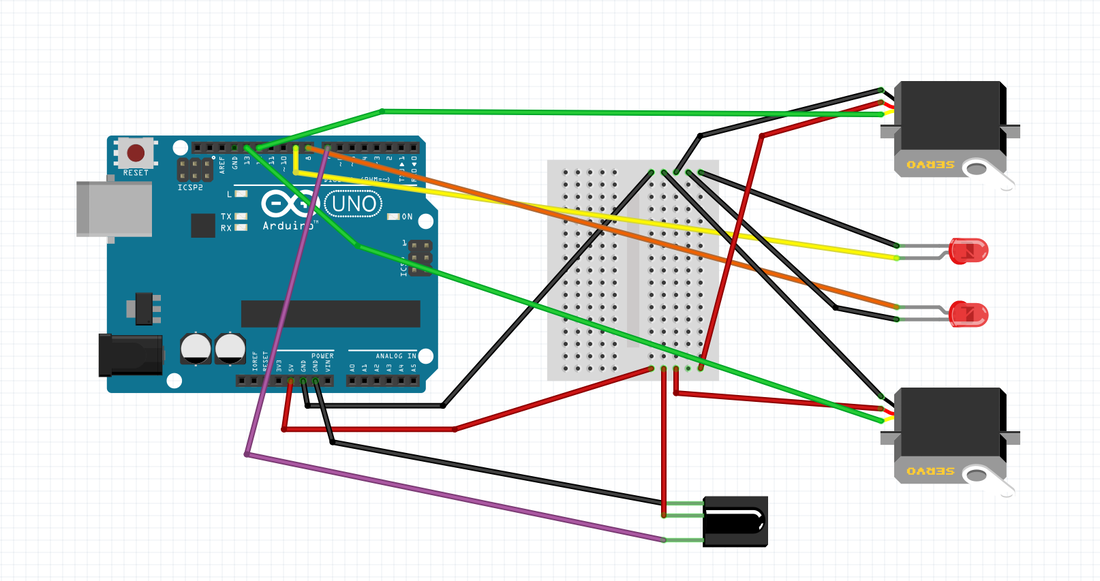
3. Wiring
Follow Diagram to wire correctly.
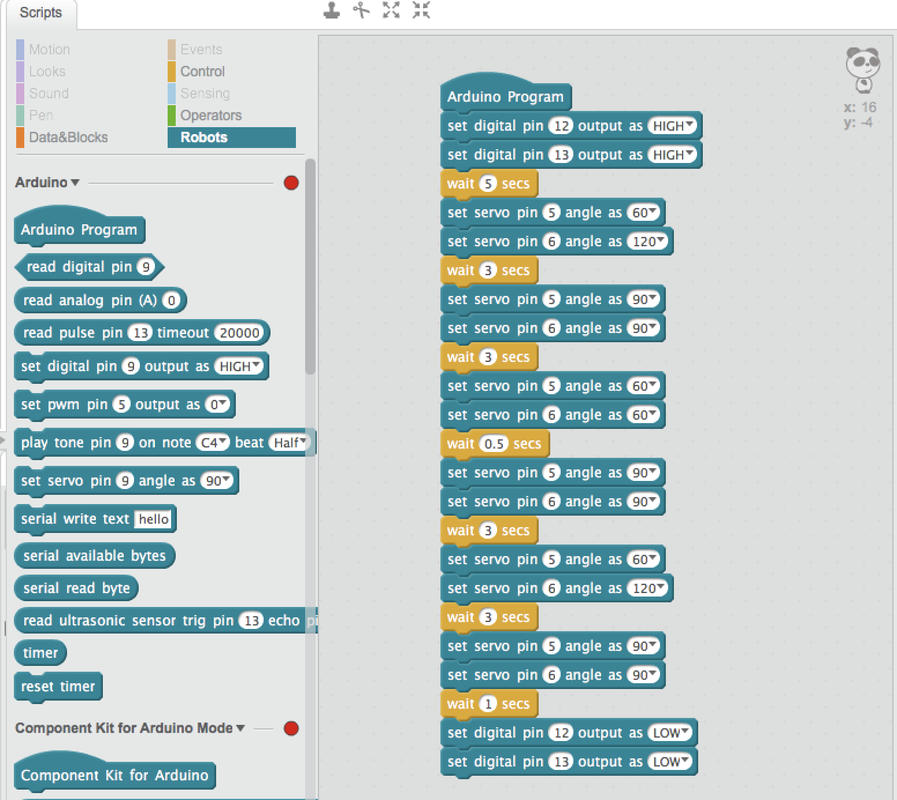
4. Coding
You can code with either Arduino C code using the Arduino IDE or with mblock scratch code using mblock software as shown below.
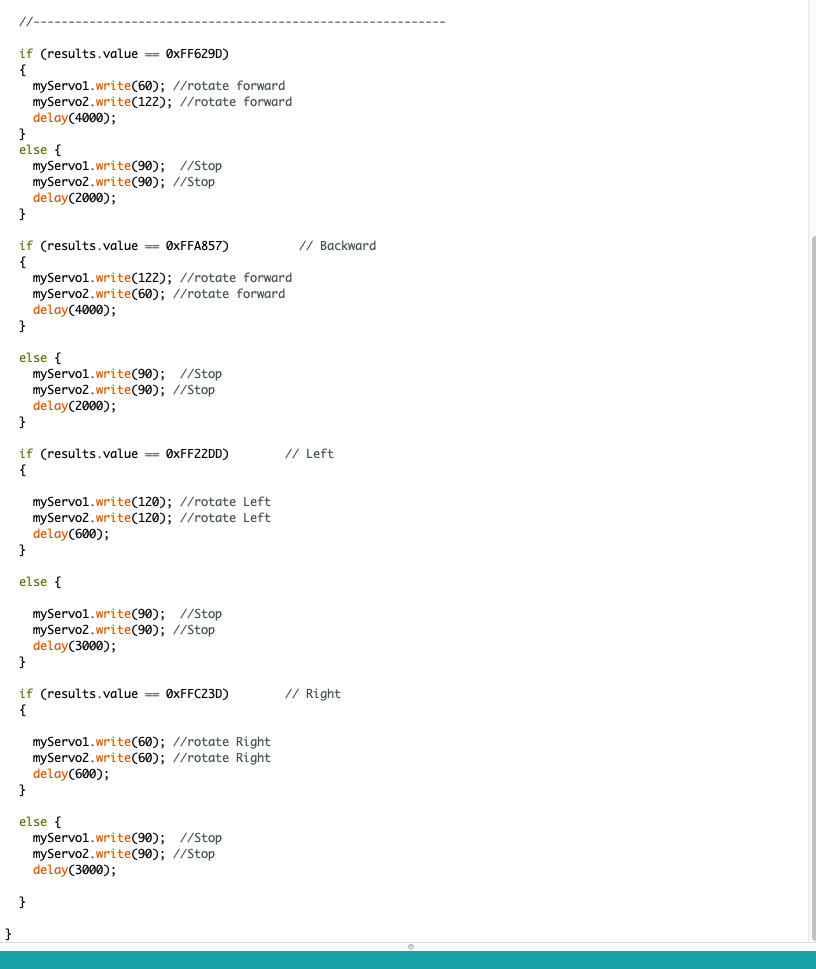
Important Note: Remember that each servo rotates in the same direction. This means that when you attach them to the left and right wheel and program them, they will rotate in the opposite directions if you code them to go toward the same angle. 0 to 360 degrees. So you will have to correct that by coding each servo to go in opposite directions so the wheel will turn in the correct direction. One side towards 120 degrees and the other side towards 60 degrees.
Important Note: Remember that each servo rotates in the same direction. This means that when you attach them to the left and right wheel and program them, they will rotate in the opposite directions if you code them to go toward the same angle. 0 to 360 degrees. So you will have to correct that by coding each servo to go in opposite directions so the wheel will turn in the correct direction. One side towards 120 degrees and the other side towards 60 degrees.
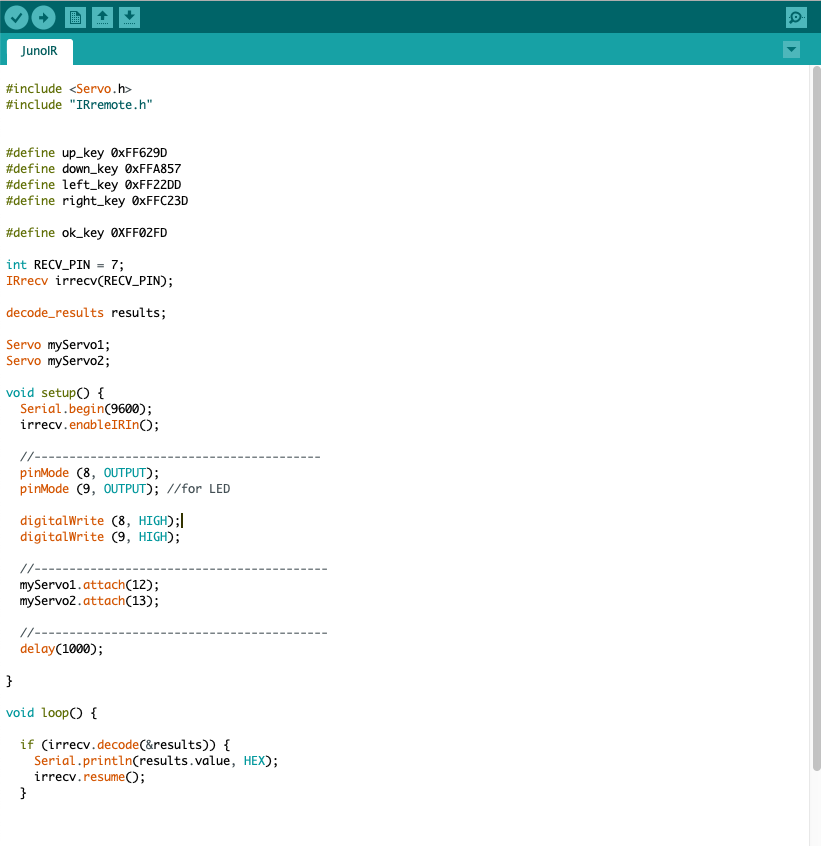
Arduino Code
mBlock Code
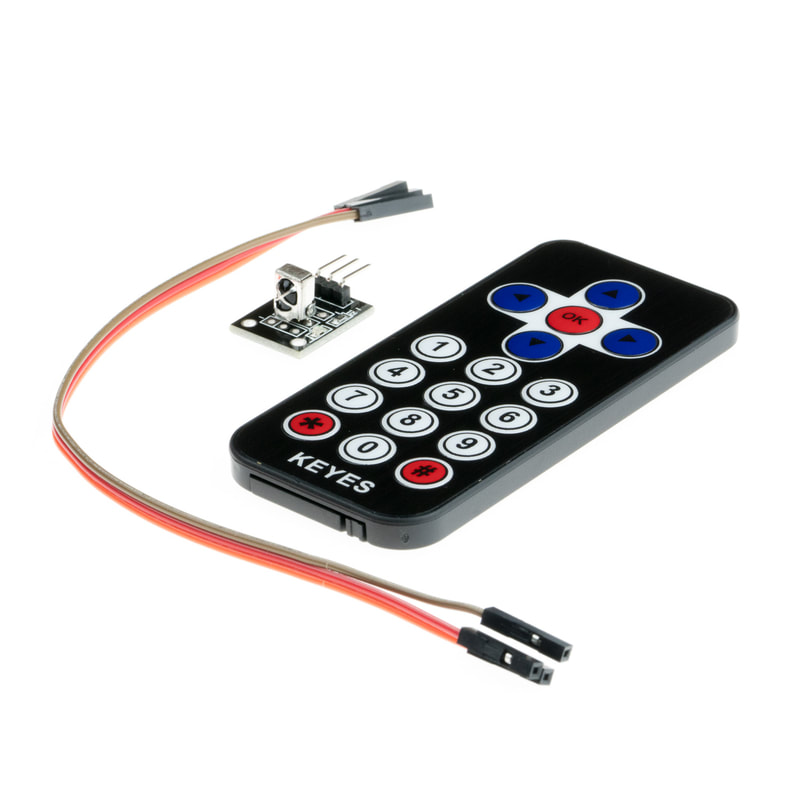
Using Infrared Remote
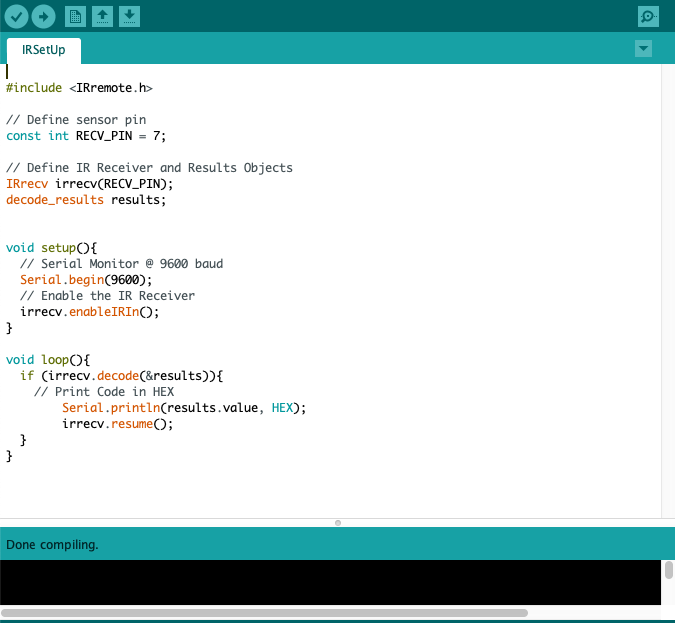
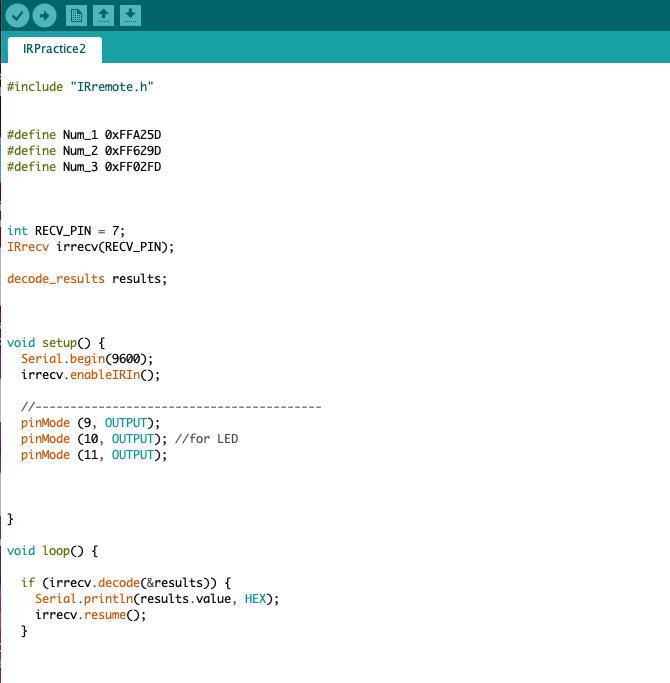
Before you begin to control objects and sensors, you will need to find out the hexadecimal number for the buttons you will use on your remote. To do this you need to load the code below and open the Serial Monitor. Once you load the code, press a button on the remote. You will see a hexadecimal number appear. This number will have letters and numbers. That is the number for that button. Write it down because you will need it later. Do this for each button on the remote you want to use to control your sensor or motor.
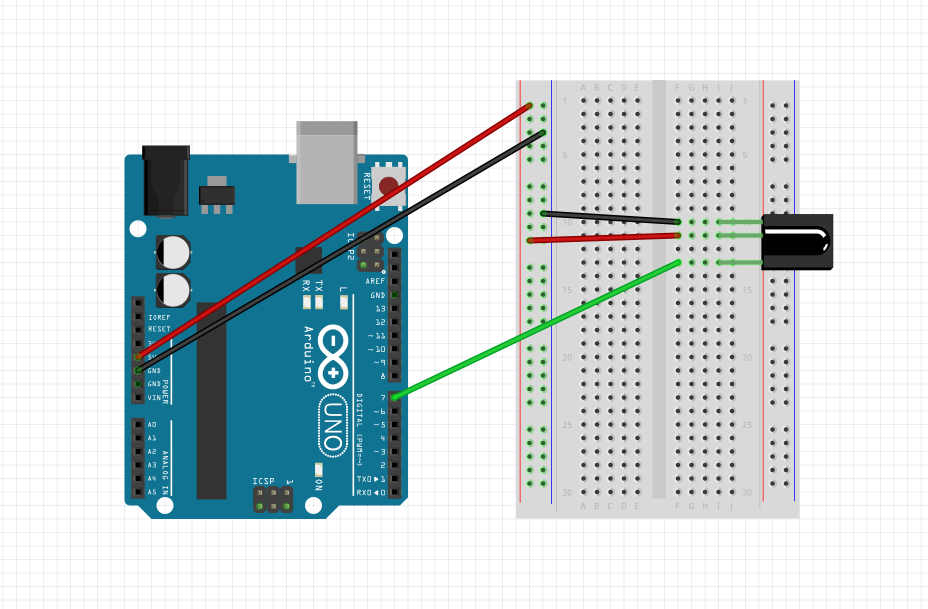
Wire your parts as shown below.
Wire your parts as shown below.
Write the code to find the hexadecimal number for a button. Once you've written the code upload it to the Arduino Uno. Open your Serial Monitor. Then aim your remote at the receiver and press a button that you want to use in your project.
|
The hexadecimal number that appears with letters and numbers is the number for the button you pushed. Save that number. You will need it later.

|
IR remote Practice
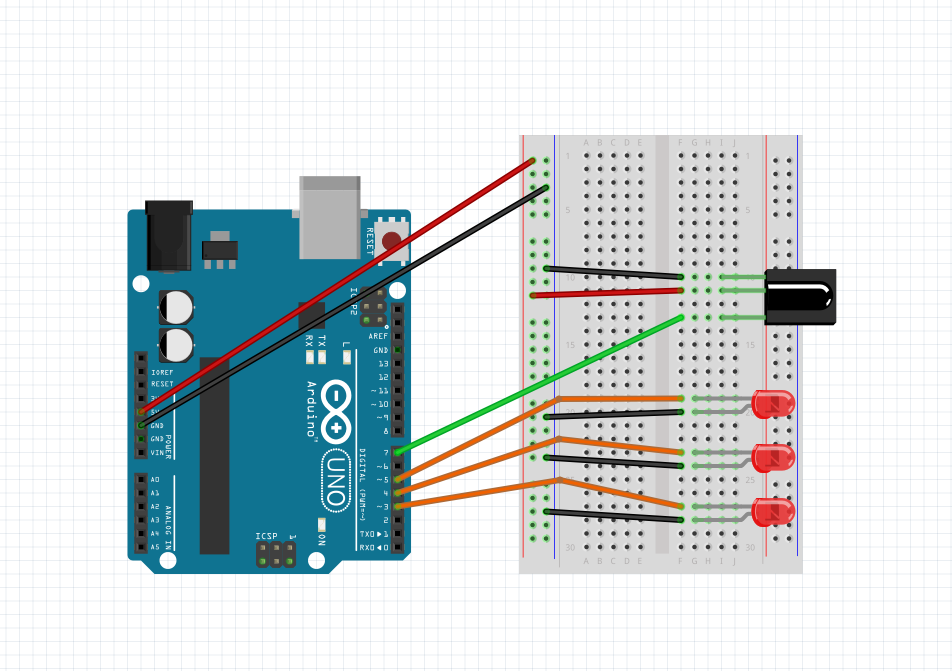
Wire this project as shown. This will help you practice the IR Remote skills to understand how it works.
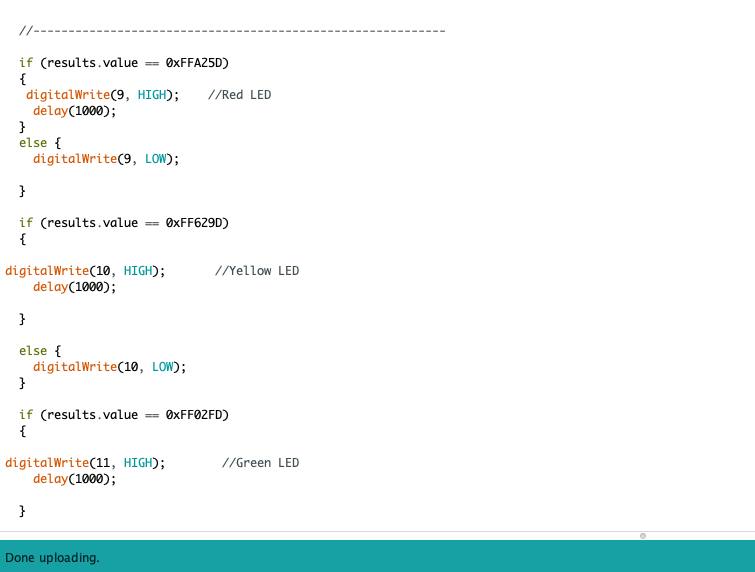
Remember your Hexadecimal numbers will be different than the ones shown here. Also notice that you must place a 0x before your numbers.
|
|
Code for IR Remote Control
| junoiremote.txt |
The Hex numbers for each button will be different every time. Use the IRsetup code in the instructions above to find the Hex numbers for your remote.